How to Replace Components in Antminer E9 Pro?
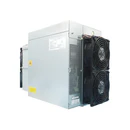
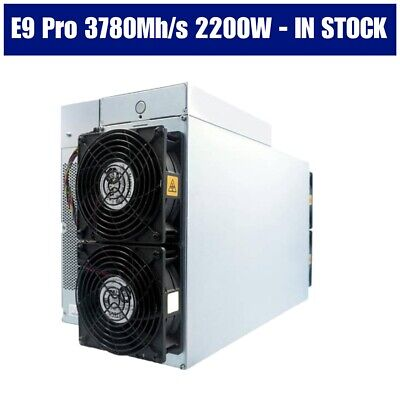
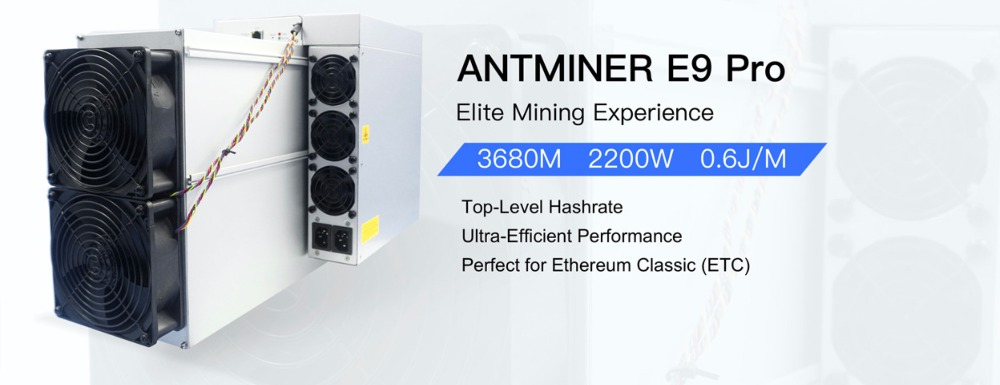
The Antminer E9 Pro is a powerhouse in the world of Ethereum Classic (ETC) mining, delivering an impressive 3.68 Gh/s hashrate with exceptional efficiency. Its advanced engineering and modular design make it a favorite among professional miners and cryptocurrency enthusiasts alike. However, like all mining equipment, the E9 Pro requires regular maintenance and occasional component replacements to ensure optimal performance. In this guide, we’ll walk you through the process of replacing key components in the Antminer E9 Pro, offering practical insights and tips to keep your mining operation running smoothly.
Why Component Replacement Matters
Mining hardware operates under constant stress, with components like fans, power supplies, and hashboards working 24/7 in demanding environments. Over time, wear and tear can lead to reduced efficiency, overheating, or even complete failure. Replacing components proactively is essential to:
- Maintain peak performance: A failing component can bottleneck your entire system, reducing your hashrate and profitability.
- Extend the miner’s lifespan: Regular maintenance ensures your E9 Pro remains operational for years, maximizing your return on investment.
- Prevent costly downtime: Addressing issues early minimizes the risk of unexpected shutdowns, which can be costly in a competitive mining landscape.
The Antminer E9 Pro’s modular design makes component replacement straightforward, even for miners with limited technical expertise. Below, we’ll cover the most common replacement scenarios and provide step-by-step instructions.
Essential Components for Replacement
1. Cooling Fans
The E9 Pro is equipped with four high-performance cooling fans that maintain optimal operating temperatures. Fan failure is one of the most common issues miners face, as these components are subject to constant use.
Signs of Fan Failure:
- Increased noise levels
- Overheating or frequent thermal shutdowns
- Reduced airflow from the exhaust
Replacement Steps:
- Power down the miner: Always disconnect the power supply before working on your miner.
- Remove the top cover: Unscrew the cover to access the internal components.
- Disconnect the fan cables: Carefully unplug the cables from the control board.
- Unscrew the faulty fan: Remove the screws holding the fan in place.
- Install the new fan: Secure the replacement fan and reconnect the cables.
- Reassemble the miner: Replace the top cover and power up the unit to test the new fan.
Pro Tip: Keep spare fans on hand to minimize downtime. Opt for high-quality replacements to ensure longevity.
2. Power Supply Unit (PSU)
The PSU is the lifeblood of your miner, converting AC power to the DC voltage required for operation. While the E9 Pro’s PSU is robust, it can fail due to power surges or prolonged use.
Signs of PSU Failure:

- Miner fails to power on
- Fluctuating hash rates
- Burning smell or visible damage to the PSU
Replacement Steps:
- Disconnect the miner: Unplug all cables from the PSU.
- Remove the PSU mounting screws: Carefully detach the PSU from the miner’s chassis.
- Install the new PSU: Secure the replacement PSU and reconnect all cables.
- Power up the miner: Ensure the new PSU is functioning correctly.
Pro Tip: Use a surge protector to safeguard your PSU from voltage spikes.
3. Hashboards
Hashboards are the heart of the mining process, performing the complex calculations required for ETC mining. While the E9 Pro’s hashboards are designed for durability, they can fail due to excessive heat or manufacturing defects.
Signs of Hashboard Failure:
- Reduced hashrate
- Error messages on the miner’s interface
- Visible damage to the hashboard
Replacement Steps:
- Power down the miner: Ensure the unit is completely turned off.
- Remove the top cover: Access the internal components.
- Disconnect the hashboard cables: Carefully unplug the cables from the control board.
- Unscrew the faulty hashboard: Remove the screws securing the hashboard.
- Install the new hashboard: Secure the replacement hashboard and reconnect the cables.
- Reassemble and test: Power up the miner to verify the new hashboard is functioning.
Pro Tip: Regularly clean your miner to prevent dust buildup, which can contribute to hashboard failure.
4. Control Board
The control board acts as the brain of the E9 Pro, coordinating the operation of all components. While failures are rare, they can occur due to electrical issues or physical damage.
Signs of Control Board Failure:
- Miner fails to boot
- Unresponsive interface
- Frequent error messages
Replacement Steps:
- Power down the miner: Disconnect all power sources.
- Remove the top cover: Access the internal components.
- Disconnect all cables: Carefully unplug the cables connected to the control board.
- Unscrew the control board: Remove the screws securing the board.
- Install the new control board: Secure the replacement board and reconnect all cables.
- Reassemble and test: Power up the miner to ensure proper operation.
Pro Tip: Handle the control board with care to avoid static discharge, which can damage sensitive components.
Tools and Supplies for Component Replacement
To successfully replace components in your Antminer E9 Pro, you’ll need the following tools and supplies:
- Screwdrivers: Phillips and flathead varieties for removing screws.
- Anti-static wrist strap: Protects sensitive components from static discharge.
- Compressed air: For cleaning dust and debris from internal components.
- Replacement parts: Keep spare fans, PSUs, hashboards, and control boards on hand.
- Thermal paste: For reapplying thermal interface material when replacing components.
Best Practices for Component Replacement
- Work in a Clean Environment: Dust and debris can damage your miner’s components. Ensure your workspace is clean and well-ventilated.
- Follow Safety Protocols: Always disconnect power before working on your miner. Use an anti-static wrist strap to protect sensitive components.
- Document Your Work: Take photos or notes during disassembly to ensure proper reassembly.
- Test After Replacement: Power up the miner and monitor its performance to verify the replacement was successful.
- Maintain Regular Inspections: Schedule routine maintenance to identify and address potential issues before they escalate.
Conclusion
The Antminer E9 Pro is a robust and efficient mining solution, but like all hardware, it requires regular maintenance to perform at its best. By understanding how to replace key components like fans, PSUs, hashboards, and control boards, you can ensure your miner remains operational and profitable for years to come.
With its modular design and superior serviceability, the E9 Pro makes component replacement accessible even for miners with limited technical expertise. By following the steps outlined in this guide and adhering to best practices, you can minimize downtime and maximize your mining efficiency.
Remember, proactive maintenance is the key to sustainable mining operations. Keep spare parts on hand, monitor your miner’s performance regularly, and don’t hesitate to replace components at the first sign of failure. With proper care, your Antminer E9 Pro will continue to deliver exceptional results, making it a valuable asset in your cryptocurrency mining arsenal.